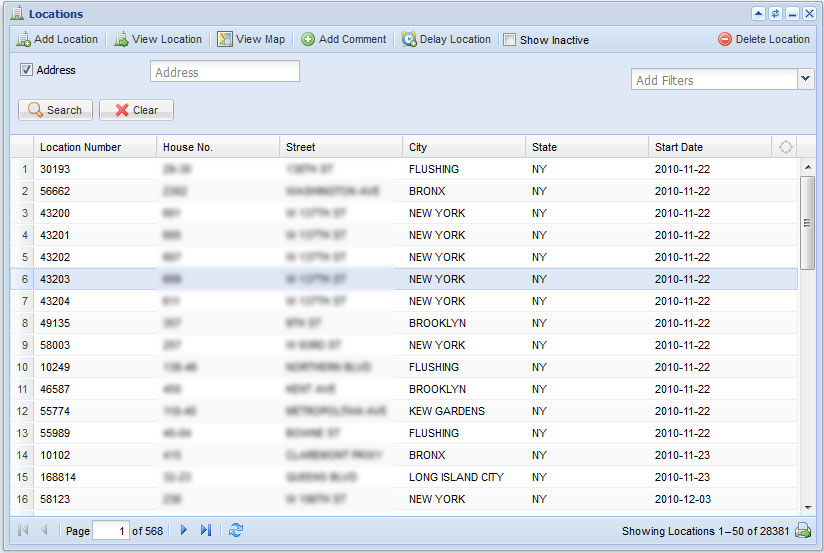
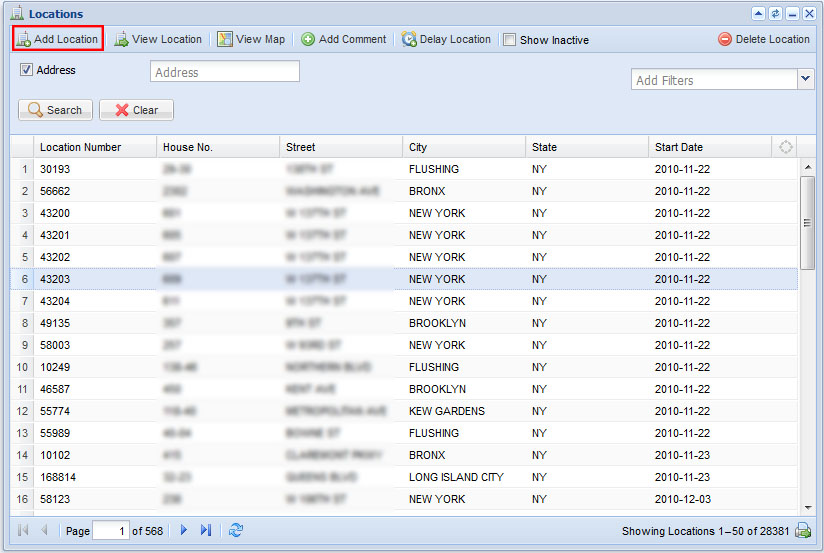
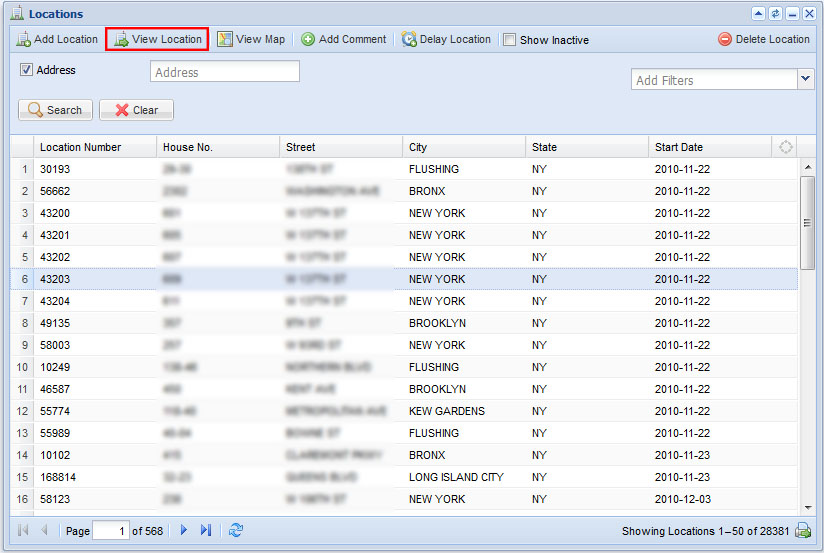
Located at the top of the Versentia Home Button menu, the Locations window gives you access to all properties visited and serviced by your company. From here you can access general information, add new locations or view their position on a map. In this section you c an find:
Filter or search in locations by:
- Address
- Location Number
- Client Number
- Client Name
- Object Identifier
- Job Number
- Company
To clear the search field click the ![]() Clear Search icon in the top right corner.
Clear Search icon in the top right corner.
To Add a Search Filter
- Select filter(s) from the Add Filters drop-down list
- Enter information into the bars beside the filter(s)
- Click on the
 Search icon to see results
To Remove Search Filter
- Check of the filter(s) you wish to remove
- Click on the
 Clear icon
Show Inactive Locations
- To see inactive locations check Show Inactive located in the main Locations menu to the right.
Print Feature
- To print the current selected location click on the Print icon located on the bottom of the locations window.
Refresh Feature
- To refresh the current location list click on the
 Refresh icon located at the bottom of the locations window.
Viewing Multiple Pages
- Use the page navigation bar located in the bottom left corner of the Locations window. You can navigate through the pages by Skip to First/ Previous Page/ or Next/ Skip to Last Pages
This action can only be performed on a Deactivated Location.
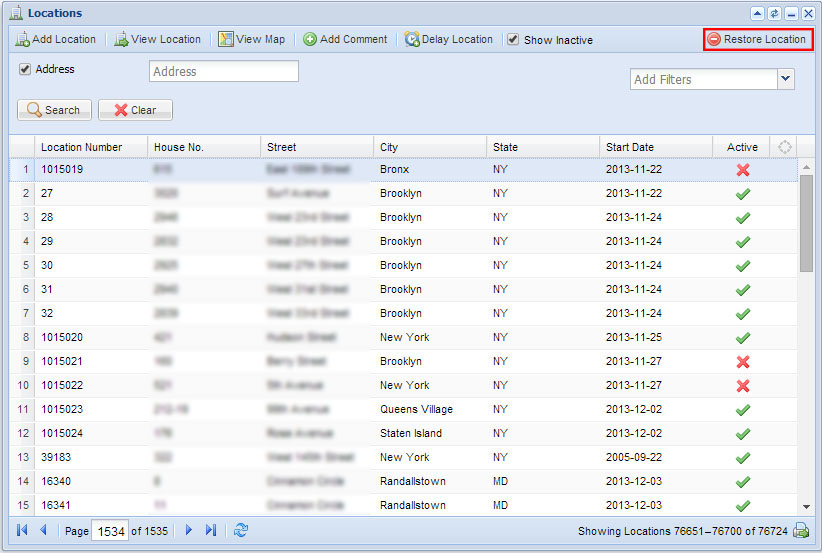
- Select Show Inactive from the tab, this will show inactive locations with a red x at the end of their information string.
- Select a Deactivated Location, an then click on Restore Location in the top right corner.
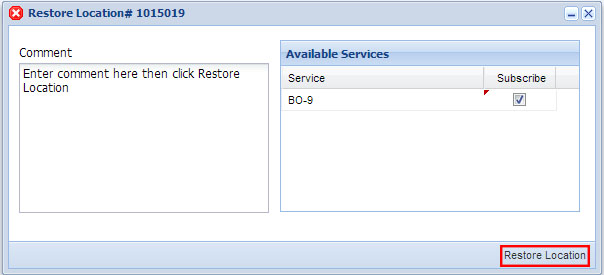
- Restore Location help window will open, select by checking off and subscribe to available service if applicable.
- Enter a comment and click on Restore Location.
- Alternate: Select and inactive location, click on the second tab, View Location, then click Activate Location in the help window.
Delete Location
To delete a location from the list, the icon is located in the top right corner of the window.
- Select a location to delete.
- Click on the
 Delete Location icon.
 - Press Yes to confirm.
- All deleted locations will be considered inactive.
From the main Location Window, select the first button, this will bring up a help window.
- Make sure you are in the first tab in the help window, Location Details, and choose a company from the drop down list.
- You will see another option open, you can chose a jurisdiction and fill out any other necessary information.
- You must enter the following required information:
- H Number
- Street
- City
- State
- You may chose to fill out the following optional fields:
- NAICS
- Location Name
- Zip
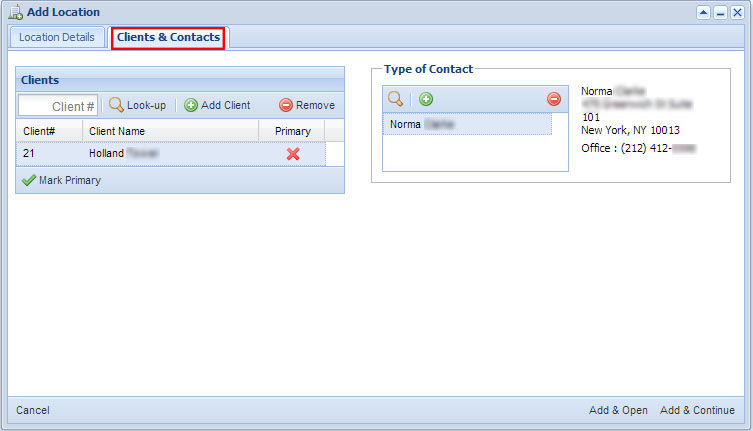
- Click Validate & Add below the address information, then select the second tab in the help window: Clients & Contacts. To finish adding a location this tab must also be filled out.
- Each location requires a minimum of one Client, Scheduling, and Owner contacts.
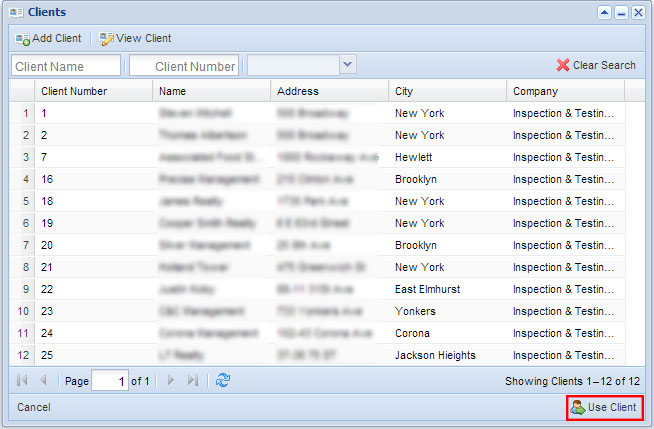
- To assign and existing client enter their client number and click on the Search icon in the help window. Select a client from the search list and click Use Client in the bottom right corner.
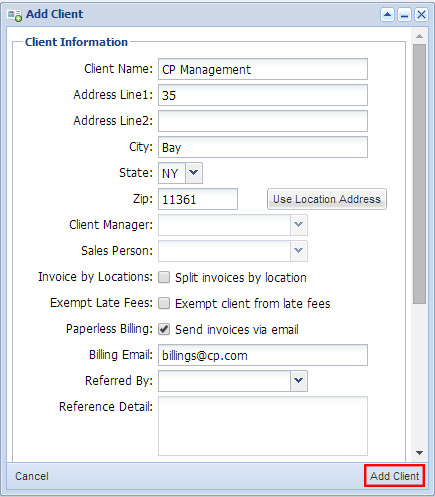
- To add a new client click on the Add icon, and fill out all the required client information:
- Client Name
- Address Line 1 (to use the location address click Use Location Address)
- City
- State
- Zip
- Referred By
- Reference Detail, based on Referred By
- Contacts (one needs to be entered when creating a new Client)
- You may choose to fill out the following optional fields:
- Client Manager
- Salesperson
- Invoice by Locations
- Exempt Late Fees
- Paperless Billing (if selected, enter email address in Billing email field.)
- Scroll down to Contact section of the Add Client help window to add a Contact.
- Click Add Client to create the new location.

Custom Type Lists
Under the Client/Contact tab there can be custom types of clients and contacts added, and there can be a limitless amount.
Once you have filled out both the Location Detail and Client & Contact tabs click on either:
- Add & Open which will create the new location, it will remain in view.
- OR click on Add & Continue, creating the new location and opening a blank Add Location help window so you can continue adding new locations.
Removing Icon
If you need to remove information from the Client & Contact tab you will need more than one client in the screen.
- Select the Client & Contacts tab in the help window.
- If their is more than one client in the Client list you can delete select the Client you wish to delete and press the Delete icon.
- You cannot delete the primary contact (the one with the green check-mark next to it) to do this you must mark a new or other contact as the primary then delete the old primary.
This is the second button in the main Locations window. You will automatically be in the first tab, called Location.
Location
The first tab in the View Locations window.
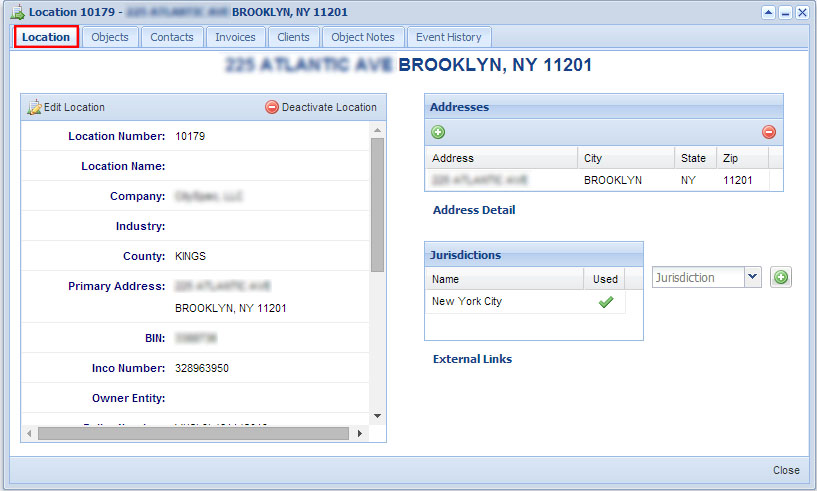
Edit Location
- Click Edit Location located in the left corner of the window.
- Edit desired location information.
- Scroll down and click submit
Deactivate Location
- Click Deactivate Location located to the right of Edit Location.
- Click Yes to confirm action.
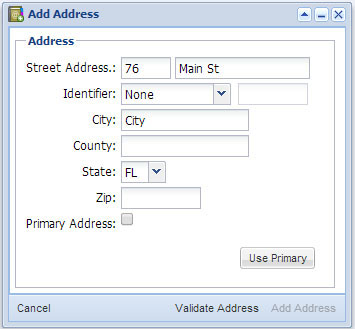
To Add an Address
- Click the Add icon located under the Address list.
- Enter the address in the Add Address help window.
- Check off Primary Address, if applicable.
- Click Validate Address then Add Address in the bottom right corner of the help window.
To Remove an Address
- Select an address, that is not the primary address, to remove.
- Click the Remove icon located under the Address list.
- Click Yes to confirm.
External Links
Some jurisdictions may have external links available, to access these do the following:
- Click on the Jurisdiction that is listed under the Jurisdiction section from the Location tab/screen.
- Below you will see External Links listed, to access them just click on one.
The second tab in the View Locations window. This tells you the objects associated with the selected location. From here you can see and assign services and subscriptions to any object listed under the property.
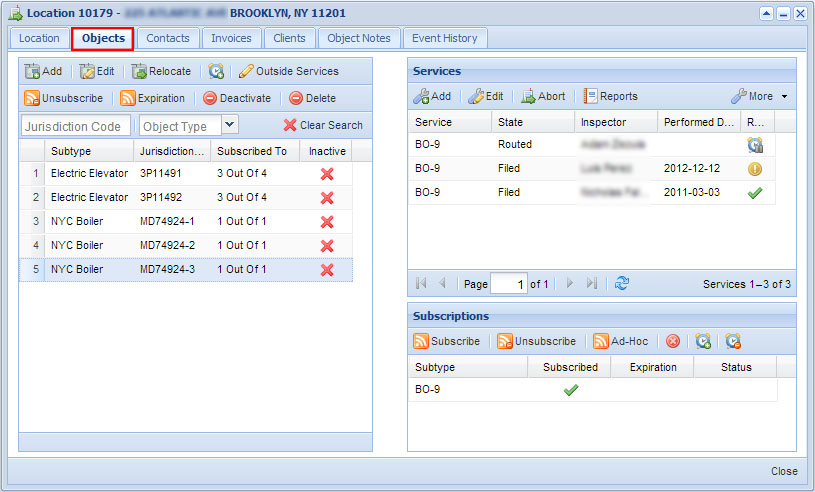
Search Options
Search by:
- Jurisdiction code
- Object
To clear the search field click the ![]() Clear Search icon in the top right corner.
Clear Search icon in the top right corner.
Add
To add an object.
- Click on the
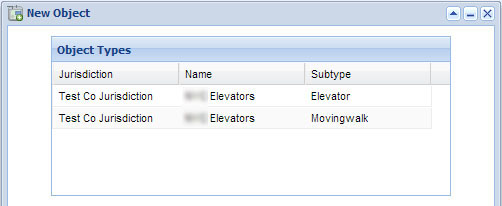
 Add icon.
 - Select an object to add from the help window.
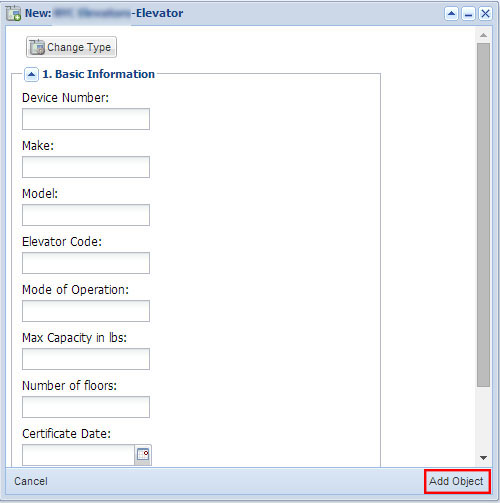
- Enter in any new object information in the following window:
- Click Add Object in the bottom right corner.
- Repeat to add another object.
Edit
To edit an object, select and object.
- Click on the
 Edit icon.
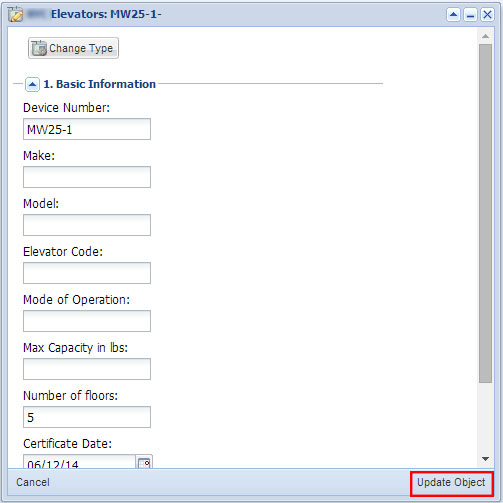
 - Update any changes in the help window.
- Click Update Object in the bottom right corner.
Relocate
To relocate an object to another Location, select and object.
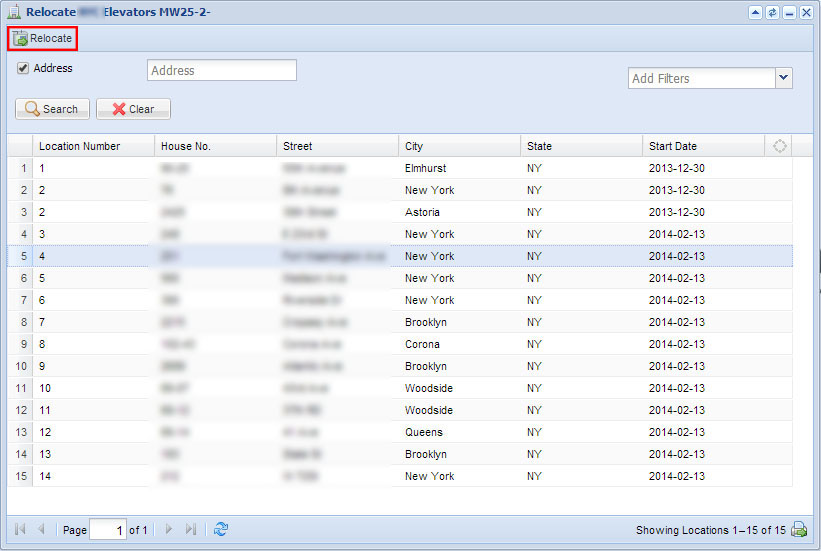
- Click on the Relocate icon.
- Select a new Location from the help window.
- Click Relocate in the top left corner.
Delay
To insert a service delay to an object, select an object.

- Click on the
 Delay icon.
 - Select a service from the help window.
- Select a subtype, optional.
- Enter expiration date.
- Enter contact date, optional.
- Click Submit.
Outside Services
Outside services are used to indicate that an object was serviced by another company, this will help keep the cycle service up to date. Versentia will consider the outside service and calculate how much time in the cycle needs to pass before another service needs to be performed. To outside service to an object, select an object.
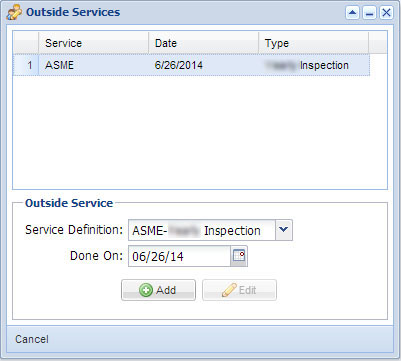
- Click on the Outside Services icon.
- Select a Service Definition from the drop down list in the help window.
- Enter a Done On date.
- Click Add.
Unsubscribe
To Unsubscribe services that an object was subscribed to, select an object, or multi-select objects with your shift key.
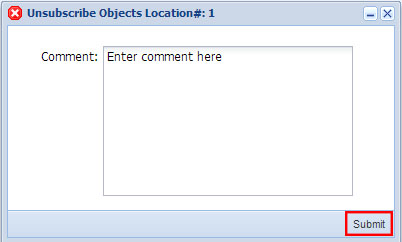
- Click on the Unsubscribe icon.
- Enter a comment, required.
- Click submit.
Expiration
To end a cycle service to an object.
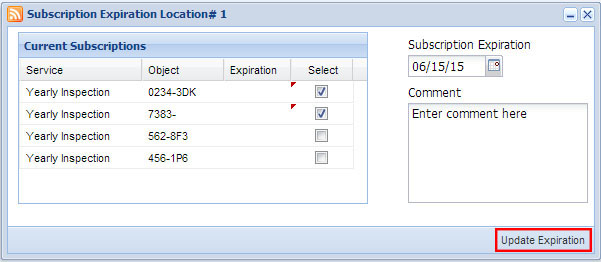
- Click on the Expiration icon.
- Select which subscription to expire by checking off the service in the help window.
- Enter a subscription expiration date.
- Enter a comment, required.
- Click Update Expiration.
Removing Expirations
To remove an Expiration Date on an Object:
- Click on the Expiration icon.
- Select which subscription to remove the expiration date from by checking it off (the subscription expiration date should be left blank).
- Enter a comment, required.
- Click Update Expiration.
Deactivate
To deactivate and object select an object. (To see how to activate a location click Activate Location.)
- Click on the Deactivate icon.
- Enter a required comment in the help window.
- Click Submit.
Delete
To delete and object select an object.
- Click on the Delete icon.
- Click Yes to confirm deletion.
Services
This section is located to the top right of the Objects tab. It allows you to view previous and current services for a selected object; you can also add, edit and abort services. To learn about all the features offered click here.
Subscriptions
This section is located to the bottom right of the Objects tab. It allows you to view previous and current subscriptions for a selected object; you can also Unsubscribe and add ad-hoc services. To learn about all the features offered click here.
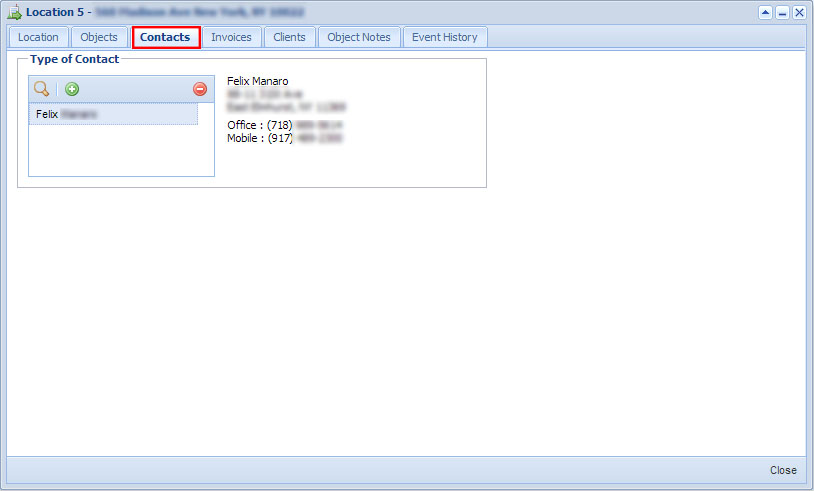
Contacts
The third tab in the View Locations window. Here you can create new types of contacts, or add existing contacts so that they are informed about the location. To read more view click on Contact.
Invoices
The fourth tab in the View Locations window. Invoices listed in this screen are services/jobs that have been performed for this location. When services move to another location, the invoices will go along with the corresponding location.
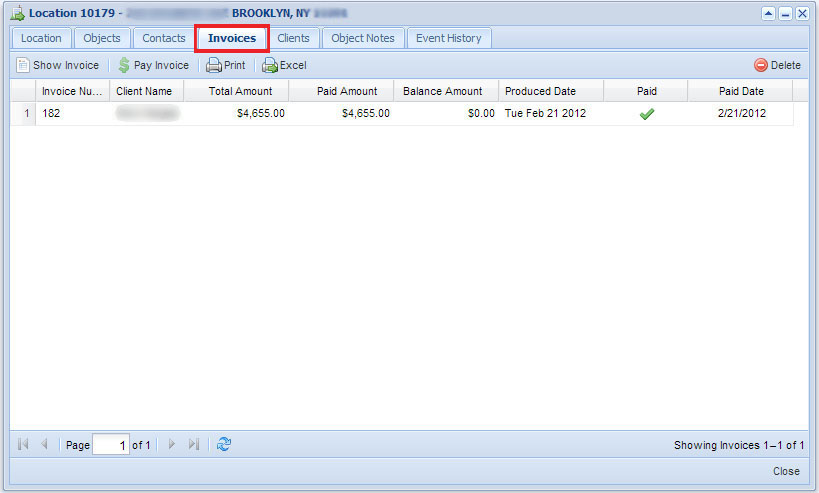
Show Invoice
Select an Invoice to view.
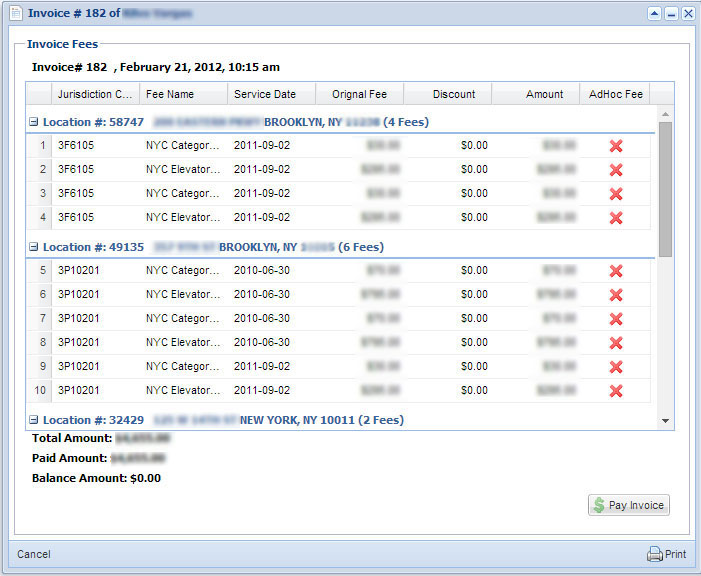
- Click Show Invoice in the upper left corner. You will be taken to the following help window:
- Click Pay Invoice in the bottom right corner of the Show Invoice help window. You can also select an invoice from the main Invoice list and click Pay Invoice, next to Show Invoice. This will apply payment to that invoice:
- Select date, defaults to current date.
- Select form of payment, defaults to check.
- Enter identifier
- Select Recipient.
- Enter payment amount.
- Click Submit.
Select which payment to apply the invoice to by checking it off in the list, under Use.
- Enter the amount to apply to the Invoice or check Pay Full to pay off the entire Invoice amount.
- Click Submit, located bottom of screen.
Edit Payment
In the Pay Invoice help window click Edit Payment.
- Make any desired edits to the payment.
- Click Submit to update.
To print an invoice go back to the Invoice tab.
- Select an invoice from the list.
- Click the Print icon.
- To print multiple invoices use the shift key to multi-select and then follow steps 1-2.
Excel
To generate an Invoice Report select an invoice from the list in the main Invoice tab.
- Select an invoice from the list.
- Click the Excel icon.
- An Excel document will automatically be downloaded to your computer.
Delete
To delete an Invoice select an invoice from the list in the main Invoice tab.
- Select an invoice from the list.
- Click the Delete icon in the top right corner.
- Enter a comment, required.
- Click Submit.
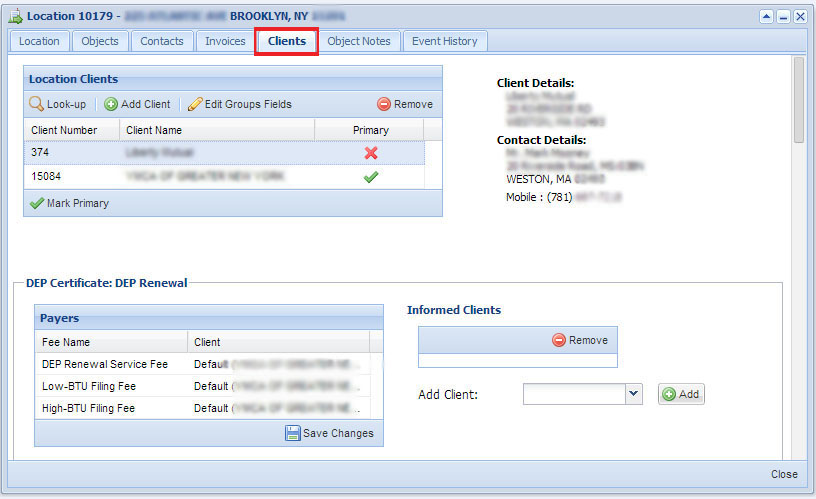
Clients
The fifth tab in the View Location window. Here you can add clients, view their details, manage what clients receive updates about services and edit their information.
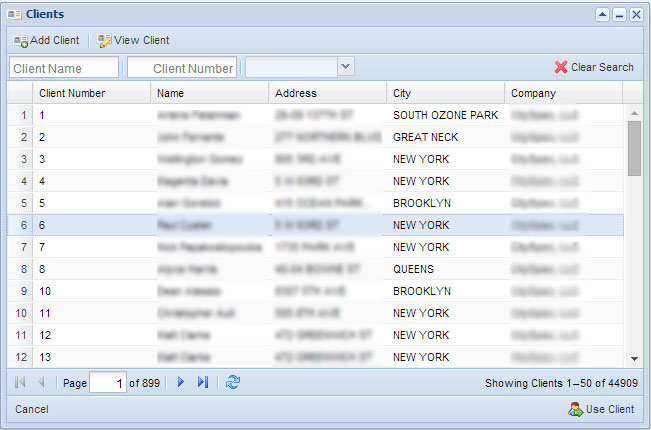
Look-Up
To look-up a client, follow the following steps; for more information visit the Clients page under User Manual Sections.
- To look up location clients click on the Search icon.
- Select a client.
- Click Use Client.
Add Client
- Click on the Add icon, fill out any required information.
- Client Name
- Address Line 1
- City
- State
- Zip
- Referred By
- Reference Detail, based on Referred By.
- Contacts
- Optional fields:
- Client Manager
- Salesperson
- Invoice by Locations
- Exempt Late Fees
- Paperless billing, if selected, enter email address in Billing email field.
- Click Add Contact in the bottom right corner to complete.
Edit Group Fields
- To remove one of the listed clients click on the Remove icon.
- To mark a client as Primary, select the desired listed client and click Mark Primary.
Update Payers
The list below Location Clients, entitled Payers, can be updated. If you want to reassign the payment to a contact that is not the Primary Contact (default payer) you can do so here.
- Go to the drop down list for the service you wish to change the payer for.
- From that list select the desired payer, if they are not there you must add them in the contacts list above.
- You can also add Informed Payers, located to the right of any services. These payers are not responsible for the payment but receive copies and updates of any results or inspections. Click Add to add them to the payers.
- Change any other services, scroll down and click Save, or the new payer will not be logged.
Object Notes
The sixth tab under the View Locations window. Here you can add notes to objects.
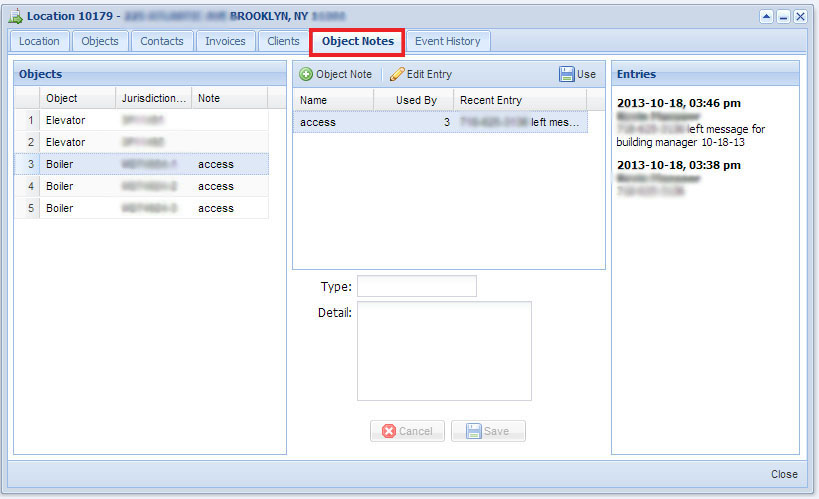
Add Object Note
- Click on the Object Note icon.
- Enter type, which will show up as the name of the note.
- Enter details, this is the content of the note.
- Click Save and the note will appear in the list above.
Edit Entry
- Select a note and click on the Edit Entry icon.
- Edit any desired information.
- Click Save and the note will appear in the list above.
Use
To assign a note to an object.
- Select an object from the left most list.
- Select a note from the middle list.
- Click the Use icon and the note will be assigned.
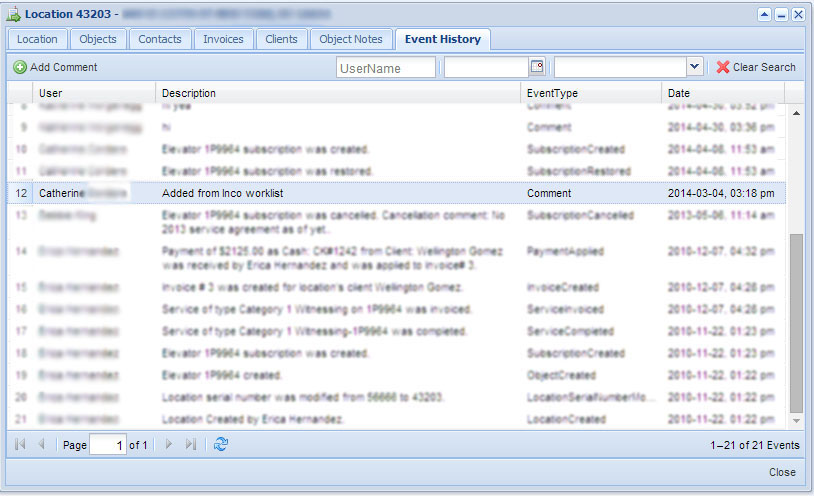
Event History
The seventh tab under the View Locations window. Here you can see a description of events recorded at the location.
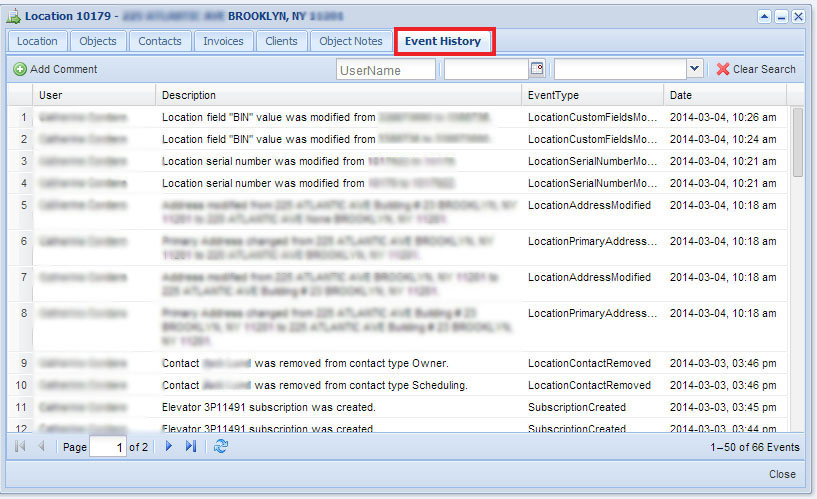
Search Features
In this tab you can search comments associated with this location. They can be searched by:
- User Name
- Date
- Event Type
To clear the search field click the ![]() Clear Search icon in the top right corner.
Clear Search icon in the top right corner.
Add Comment
See Comment for more information on how to perform this action.
This is the third button on the main Locations page, this will allow you to pull up a map with a marker of any given location.
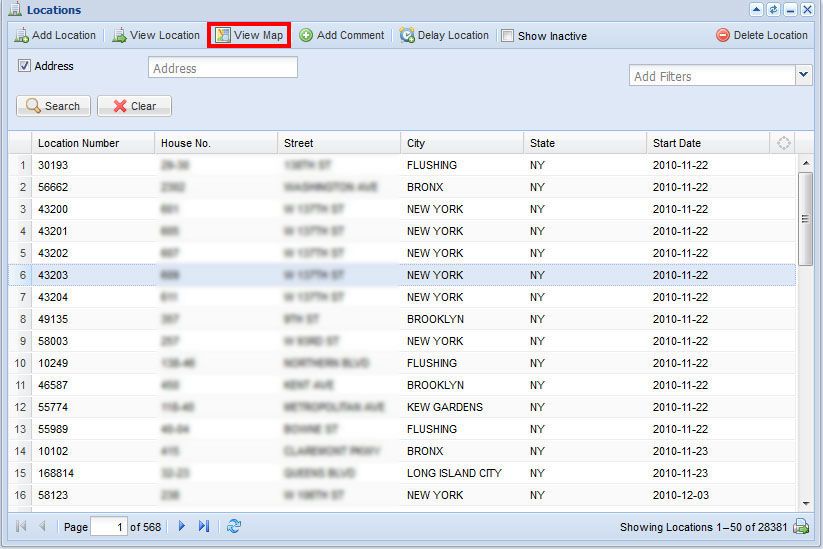
- Select a location from the list.
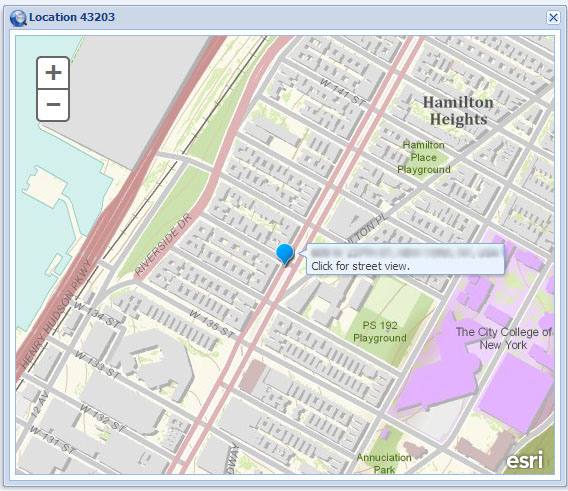
- Click on View Map, a help window with a map will appear and a red location maker will mark the exact address.
- You can navigate the map with the Zoom In icon and the Zoom Out icon.
- For a street view click the location maker on the map and it will take you to street views.
This is the fourth button on the main Locations page, this will allow you to add a comment to any location.
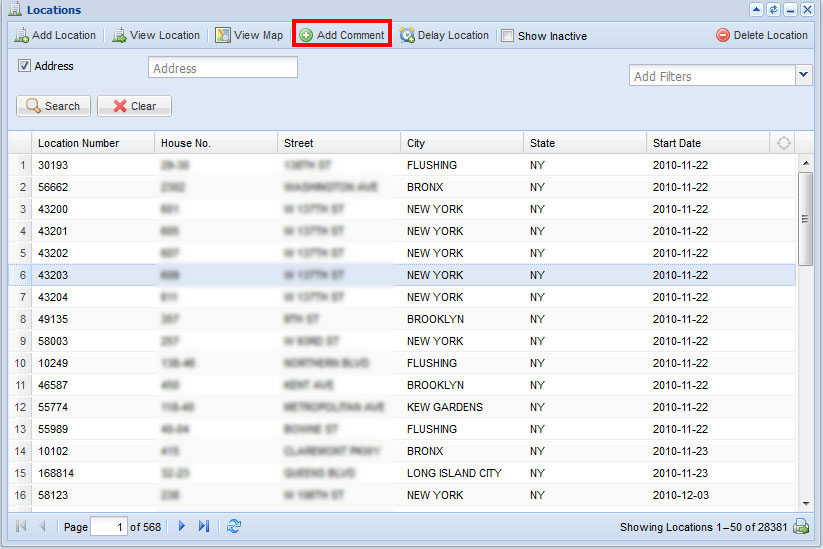
- Select a location from the list.
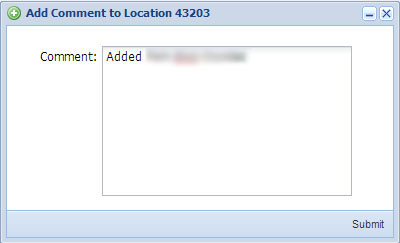
- Click on Add Comment, a help window will appear, enter desired comment.
- Click Submit.
- The comment will appear in the View Location > Event History of the selected location:
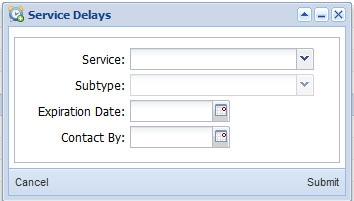
This is the fifth button on the main Locations page, this will allow you to delay a service from being performed in any location.
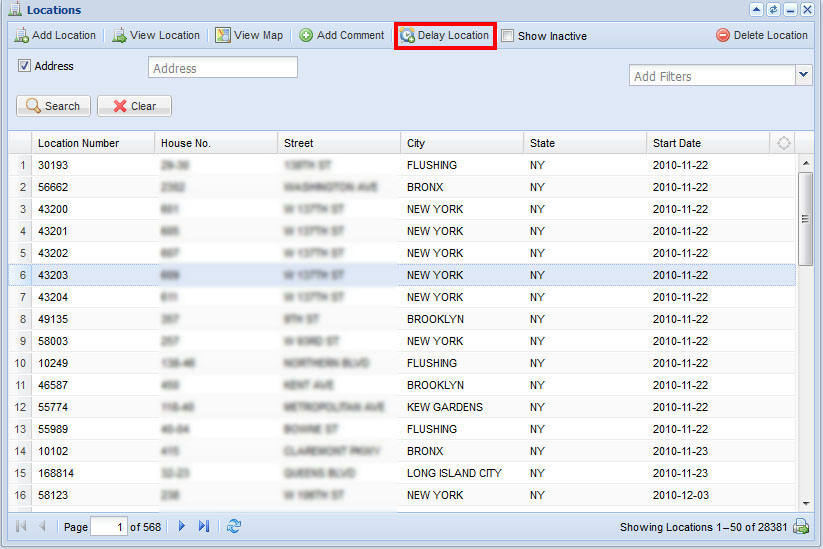
- Select a location from the list and click on Delay Location.
- Select a Service to delay from the drop down menu in the help window:
- Select a subtype if applicable.
- Enter an Expiration Date.
- Enter a Contact By date, optional.
- Click Submit to delay service to chosen location.